Start by separating the egg yolks from the egg whites. Make sure no egg yolk gets into the egg whites, as this can affect the whipping process. Set the yolks and whites aside in separate bowls.
In a large mixing bowl, add the egg whites. Using an electric mixer, begin beating on low speed. As the whites start to foam, gradually add 1/4 cup of white sugar. Continue beating until you reach stiff peaks and a thick white consistency. This process incorporates air into the egg whites, which helps the sponge cake rise and achieve its light texture.
In another bowl, add the egg yolks, vanilla essence, 3 tablespoons of milk, 3 tablespoons of vegetable oil, and the remaining 1/4 cup of white sugar. Mix well until the mixture is smooth and uniform. This creates the rich base for the sponge cake.
Next, sift the 3/4 cup of cake flour, 1/2 teaspoon of baking powder, and 1/4 teaspoon of salt directly into the egg yolk mixture. Sifting helps remove any lumps in the dry ingredients and ensures an even distribution. Mix gently until just combined, being careful not to deflate the batter.
Now, gradually add the egg white mixture into the egg yolk mixture. Don’t add it all at once; instead, incorporate it in 3 batches. Gently fold the egg whites into the yolk mixture using a spatula, ensuring that you maintain the airiness of the egg whites. This will help the batter stay light and fluffy. Be gentle in your folding to avoid overmixing.
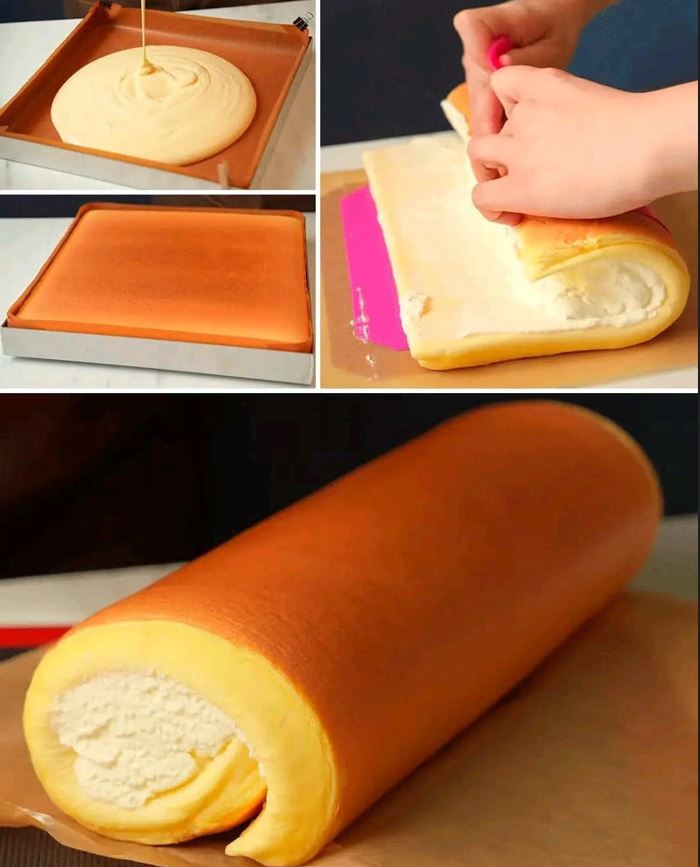
Line a baking tray with parchment paper. Pour the batter onto the tray, spreading it evenly to the edges. The parchment paper will prevent the cake from sticking and make it easier to remove once baked. Smooth the surface of the batter with a spatula to ensure an even bake.
Preheat your oven to 160°C (320°F). Bake the cake in the preheated oven for 25-30 minutes, or until the sponge is golden brown and springs back when lightly pressed in the center. You can also check doneness by inserting a toothpick into the center; if it comes out clean, the cake is ready.
Once the cake is baked, remove it from the oven and let it cool for 5 minutes while still in the baking tray. This brief cooling period will help the cake set, making it easier to handle. After 5 minutes, carefully remove the cake from the tray and transfer it to a cooling rack to cool completely. This prevents the cake from becoming soggy.
Once the cake has cooled, take a knife and trim off the edges to create neat sides. This step is optional but helps give the Swiss roll a clean, professional finish. Now, spread a generous amount of whipped cream or jam over the surface of the cake. Be sure to leave a small border around the edges so the filling doesn’t spill out when you roll the cake.
Carefully and gently roll the cake up from one edge, using the parchment paper to help guide the roll. Take your time during this step to ensure the cake doesn’t crack. Once fully rolled, wrap the Swiss roll in the parchment paper to help it hold its shape.
Place the rolled cake in the fridge for at least one hour to chill and allow the flavors to meld. Chilling the Swiss roll makes it easier to slice and helps set the whipped cream or jam inside.