- Prepare the Dry Ingredients: In a large mixing bowl, combine the 400g of tapioca starch with 10g of salt. This will serve as the base for your dough. It’s important to mix the starch and salt thoroughly before adding the liquids, as this ensures the salt is evenly distributed throughout the flour. Tapioca starch can be a bit clumpy, so a whisk works well to break up any larger pieces.
- Boil the Wet Ingredients: In a separate saucepan, combine the 150ml of water, 150ml of milk, and 100ml of oil. Place the saucepan over medium heat and bring the mixture to a gentle boil. Stir occasionally to help the oil and water mix together evenly. The goal here is to heat the liquid until it’s hot and just starting to bubble at the edges—there’s no need to bring it to a full rolling boil, but you want it to be quite hot when added to the tapioca starch.
- Combine the Liquids with the Tapioca Starch: Once the milk, water, and oil mixture has reached the desired temperature, pour it carefully into the bowl with the tapioca starch and salt. Stir immediately with a wooden spoon or spatula. The mixture should begin to thicken and form a dough-like consistency. Be cautious as the mixture will be quite hot. Continue mixing until everything is fully incorporated. Let the dough cool for a few minutes, as you’ll need it to be just warm, not hot, before adding the eggs.
- Add the Eggs: Once the dough has cooled down enough to be handled comfortably, crack the two whole eggs into the bowl. Add them to the dough and mix vigorously to incorporate. The eggs help to bind the dough together and provide moisture, contributing to the bread’s tender texture. The dough should become smooth and elastic. If the mixture feels too sticky or too dry, don’t hesitate to add a little more milk, one teaspoon at a time, until you reach the right consistency. The final dough should be soft but not runny.
- Incorporate the Cheese: Next, fold in the grated Minas cheese and Parmesan cheese. The Minas cheese provides the characteristic flavor of Pão de Queijo, while the Parmesan adds a touch of richness and sharpness. Mix the dough thoroughly, ensuring the cheese is evenly distributed throughout. You’ll begin to see small pockets of cheese throughout the dough, and you’ll know you’ve done it right when the dough feels thick and slightly sticky, but easy to handle.
- Shape the Dough into Balls: Before shaping the dough, lightly grease your hands with oil to prevent it from sticking to your skin. Using your hands, scoop out portions of the dough and roll them into small balls. You can make the balls as small or large as you prefer, but traditionally, they are about the size of a golf ball. Keep in mind that the balls will expand as they bake, so leave a little space between each one when placing them on the baking pan.
- Prepare the Baking Pan: Grease a baking pan with a thin layer of oil to prevent the cheese bread from sticking. You can also line the pan with parchment paper for easier removal after baking. Place the dough balls on the greased baking pan, leaving a little space between each to allow for expansion. If necessary, use a second pan or bake in batches to ensure the bread bakes evenly.
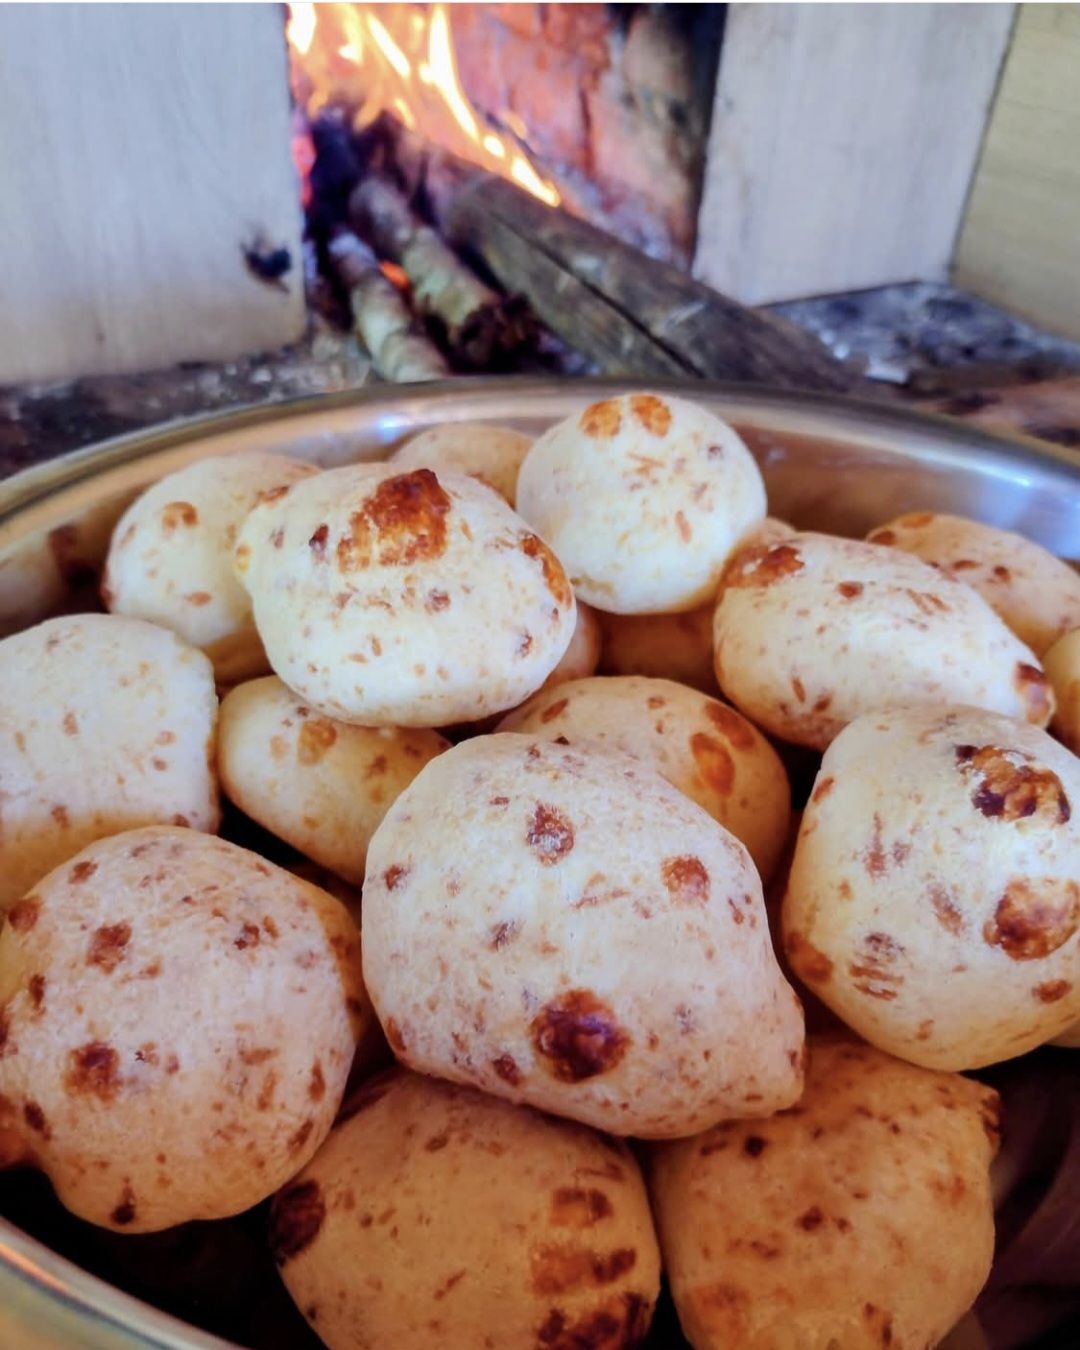
- Bake the Cheese Bread: Preheat your oven to 200°C (about 400°F). Place the baking pan with the dough balls in the preheated oven and bake for about 25 to 30 minutes. The exact time may vary slightly depending on your oven, so keep an eye on the bread as it bakes. You’ll know the Pão de Queijo is done when the tops turn a golden brown and a toothpick inserted into the center comes out clean. The aroma of melted cheese will fill your kitchen as the bread bakes, and the balls should puff up into light, airy pockets with a golden, slightly crispy crust.
- Serve and Enjoy: Once the Pão de Queijo is golden brown, remove the pan from the oven and allow the cheese bread to cool for a few minutes before serving. These are best enjoyed fresh, as they have the perfect combination of crispy exterior and gooey interior when served warm. Serve them on their own, or alongside a cup of coffee or tea. If you want to serve them as part of a larger meal, they pair wonderfully with salads, soups, or as a delicious appetizer.
Make-Ahead and Storage Tips:
